SCIM Provisioning
SCIM with Microsoft Entra ID (Azure AD)
Automatically sync employee entries with users from Microsoft Entra ID (formerly Azure AD). Any changes you make to users in Entra ID will be synchronized to AssetNode. To sync department, location and/or manager, enable the corresponding options in your AssetNode SCIM settings before you start provisioning.
Syncs every ~40 minutes
Setup guide (12 steps)
1
Log in to Azure and open Entra ID
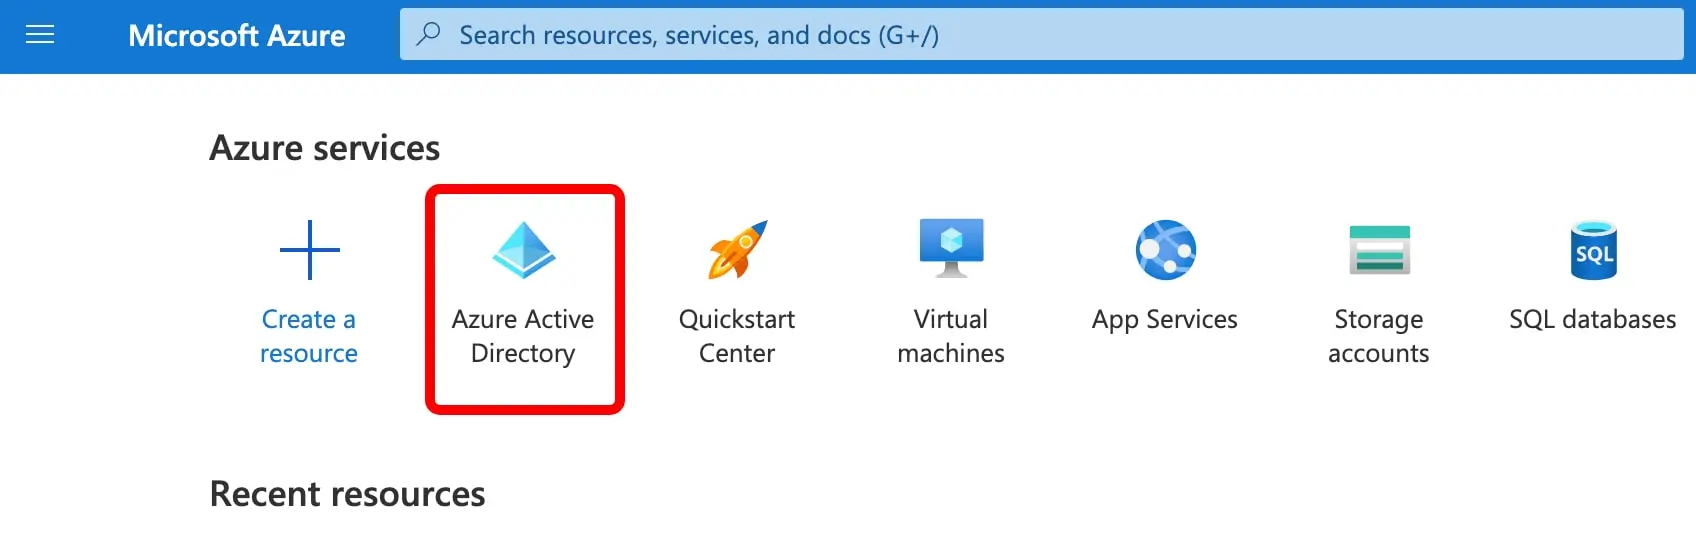
Navigate to portal.azure.com, sign in with your administrator account, and click on Microsoft Entra ID.
2
Create a new Enterprise Application
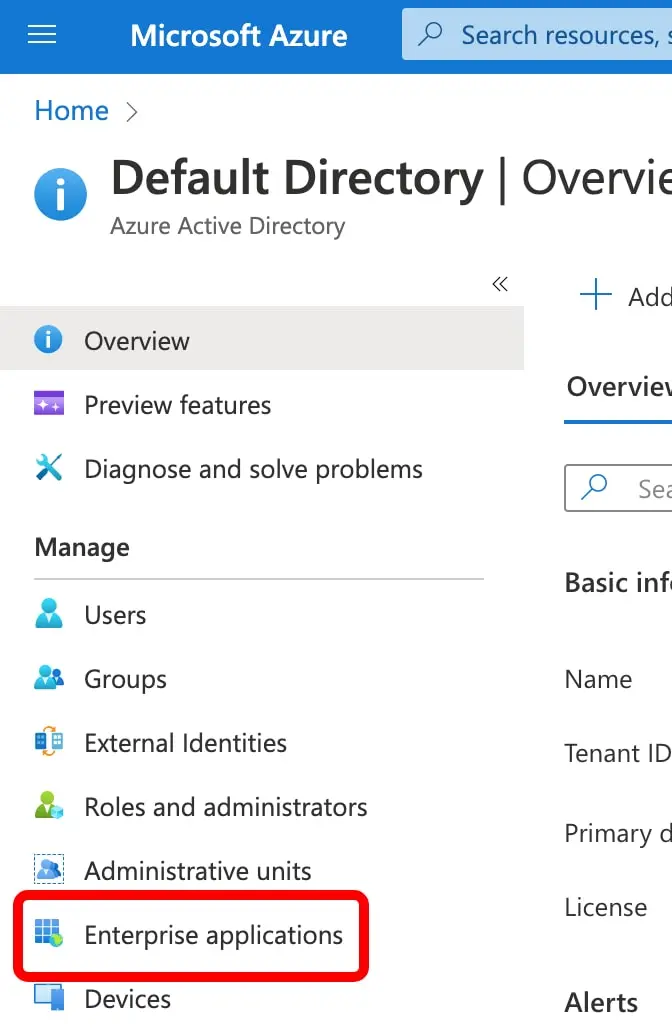
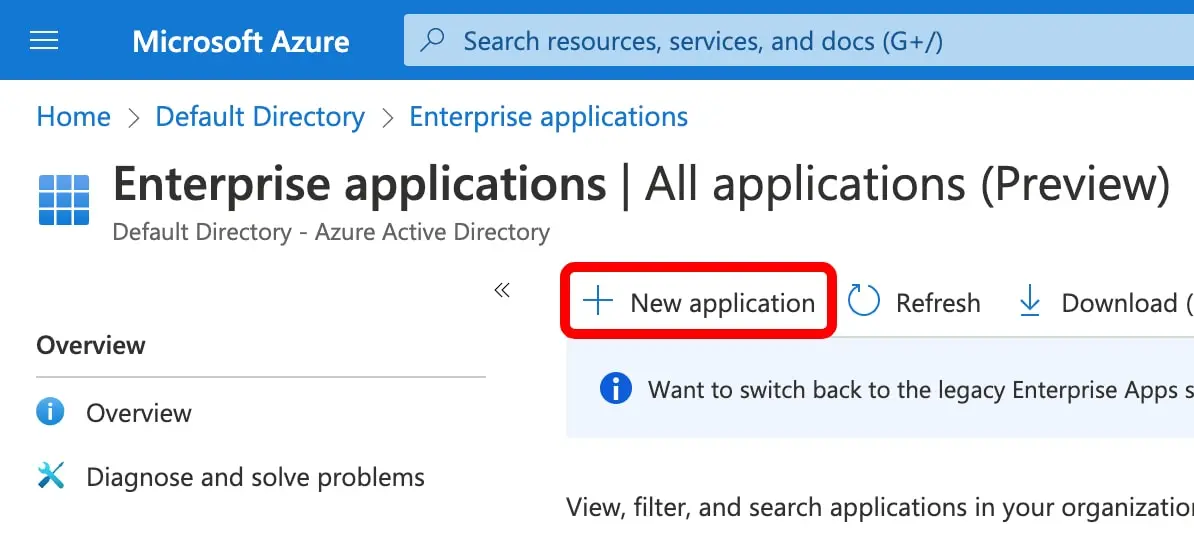
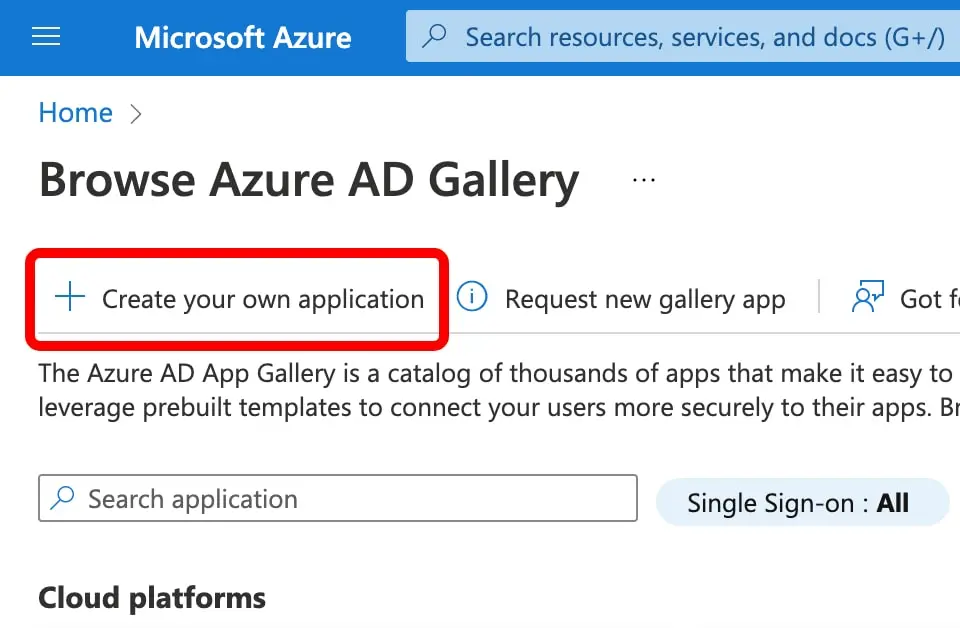
Go to the Manage tab → Enterprise Applications → New Application → Create your own application.
3
Name your application
Enter "AssetNode SCIM" as the name, select "Integrate any other application you don't find in the gallery (Non-gallery)", and click Create.
4
Open Provisioning settings
In your newly created application, click on Provisioning in the left sidebar, then click on Provisioning again to open the configuration.
5
Set Provisioning Mode and enter credentials
Change the Provisioning Mode to "Automatic". In the Admin Credentials section, enter the Tenant URL and Secret Token from your AssetNode Settings → SCIM 2.0 section. Click "Test Connection" to verify the connection works, then click Save.
6
Disable Group Provisioning
After saving, a Mappings section will appear further down on the same page. Click on "Provision Microsoft Entra ID Groups" and set Enabled to "No". Click Save.
7
Open User Attribute Mappings
Back in the Mappings section, click on "Provision Microsoft Entra ID Users" to open the user attribute mapping configuration.
8
Change userName to use email
Find the "userName" attribute row and click the Edit button. Change the Source attribute from "userPrincipalName" to "mail", then click Ok.
9
Add the location attribute (optional)
Scroll down and click "Show advanced options", then click "Edit attribute list for customappsso". Add a new attribute with the name "urn:ietf:params:scim:schemas:extension:enterprise:2.0:User:location" as type String, then click Save.
10
Map the location field (optional)
Click "Add New Mapping". Select the Entra ID field you want to use as the employee's location (e.g. "country", "officeLocation", or "city") as the Source attribute. Set the Target attribute to "urn:ietf:params:scim:schemas:extension:enterprise:2.0:User:location". Click Ok, then Save.
11
Assign Users and Groups
Go back to the application overview. Click on "Users and groups" in the left sidebar, then click "Add user/group". Select all the users or groups you want to synchronize as employees to AssetNode.
12
Start Provisioning
Go back to Provisioning and click "Start provisioning". The initial synchronization will begin and may take a few minutes depending on the number of users.
After completing setup
- The synchronization runs approximately every 40 minutes. Any changes you make to users in Entra ID will be automatically reflected in AssetNode.
- If you change an employee's name, email, or job title in Entra ID, it will automatically update in AssetNode.
- If you remove a user from Entra ID, they are marked as "Archived" in AssetNode (not deleted) — they may still have assets checked out.
- To sync department and manager info, enable the corresponding options in your AssetNode SCIM settings.